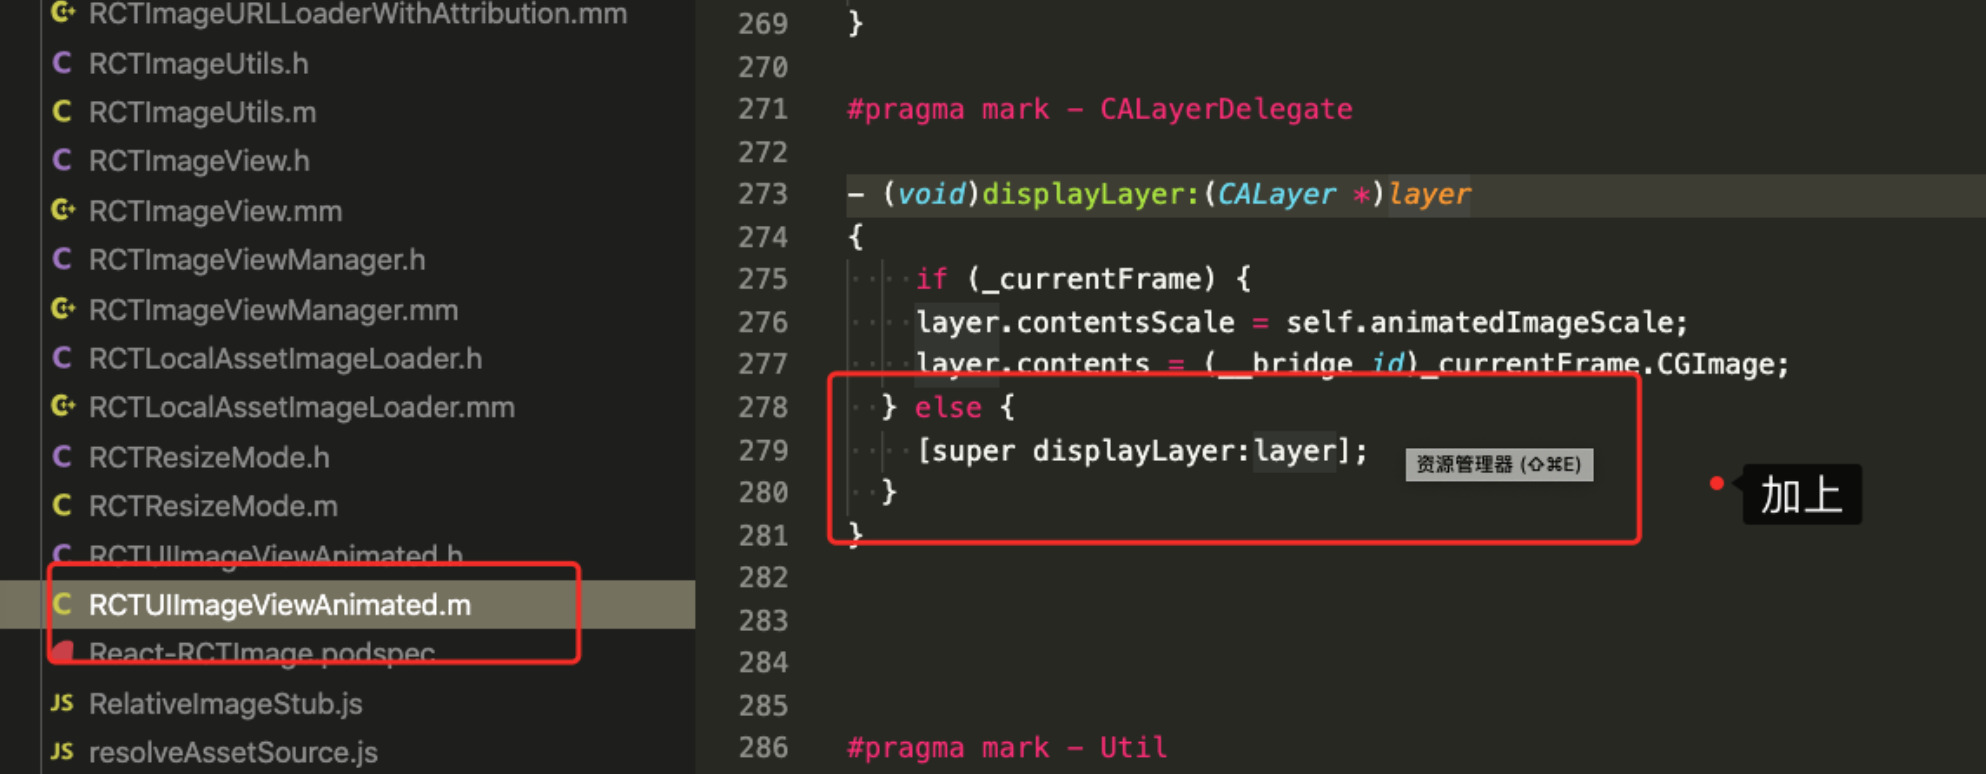
ios系统升级14.0后,模拟器看不到图片
解决方法:
- 参考网站1:https://github.com/facebook/react-native/issues/29279
- 参考网站2:https://www.jianshu.com/p/43d7afbcac66
更改文件:

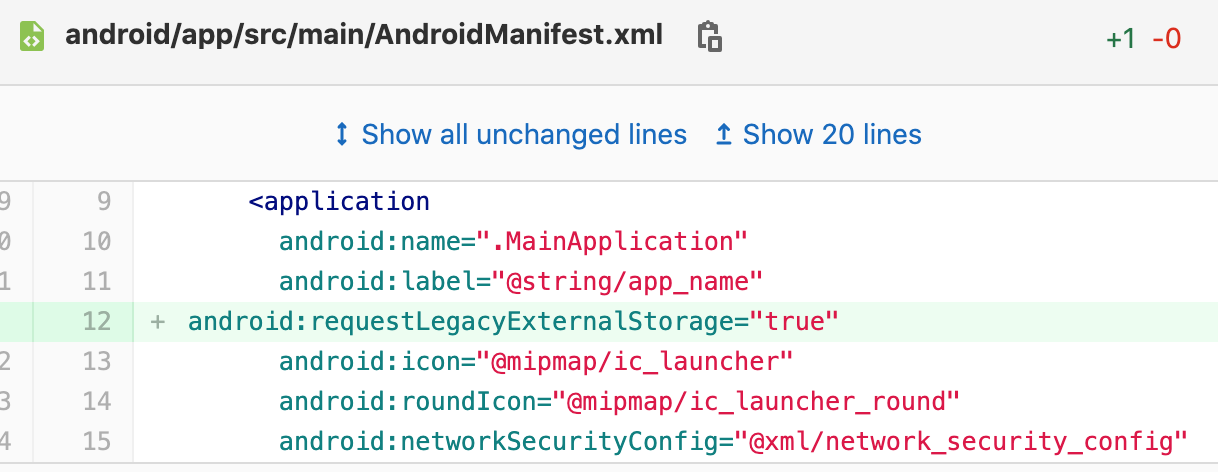
安卓高版本,拍照 安卓Q 读写文件出错
更改文件对比:

好用导航栏切换插件
https://www.npmjs.com/package/react-native-tab-view

`yarn add react-native-tab-view
`
#7bf116404d925f1e1b38657b1ae18063bf5d8881
【Android】更改 APP 访问权限和 http 请求的问题,导致 Fetch 请求失败的问题
设置网络权限
添加网络访问权限 android/app/src/main/AndroidManifest.xml,官方获取权限文档:https://reactnative.dev/docs/permissionsandroid
<uses-permission android:name="android.permission.INTERNET" />上面官网并没有介绍这个参数有可能没有用。
android:name
权限的名称。可以是应用通过 <permission> 元素定义的权限、另一个应用定义的权限,或者一个标准系统权限(例如 “android.permission.CAMERA” 或 “android.permission.READ_CONTACTS”)。如这些示例所示,权限名称通常以软件包名称为前缀。
android:maxSdkVersion
此权限应授予应用的最高 API 级别。如果从某个 API 级别开始不再需要应用所需的权限,则设置此属性非常有用。
例如,从 Android 4.4(API 级别 19)开始,应用在外部存储空间写入其特定目录(getExternalFilesDir() 提供的目录)时不再需要请求 WRITE_EXTERNAL_STORAGE 权限。但 API 级别 18 和更低版本需要此权限。因此,您可以使用如下声明,声明只有 API 级别 18 及以前版本才需要此权限:
<uses-permission
     android:name="android.permission.WRITE_EXTERNAL_STORAGE"
     android:maxSdkVersion="18" />
这样,从 API 级别 19 开始,系统将不再向您的应用授予 WRITE_EXTERNAL_STORAGE 权限。
此属性为 API 级别 19 中的新增属性。
解决方案一,没有资源不可用
使用认证过的 https 请求 API。
解决方案二,面临 APP 上架被下架的问题
创建配置文件 android/app/src/main/res/xml/network_security_config.xml 内容如下:
<?xml version="1.0" encoding="utf-8"?>
<network-security-config>
    <base-config cleartextTrafficPermitted="true" />
</network-security-config>
修改配置 android/app/src/main/AndroidManifest.xml
<application
  android:name=".MainApplication"
  android:label="@string/app_name"
  android:icon="@mipmap/ic_launcher"
  android:roundIcon="@mipmap/ic_launcher_round"
  android:allowBackup="false"
+  android:networkSecurityConfig="@xml/network_security_config"
  android:theme="@style/AppTheme">
</application>
【Android】react-native-image-picker 打包报错
查看官方: https://www.npmjs.com/package/react-native-image-picker
【iOS/Android】支付宝对接支付、提现
参考文档:https://github.com/uiwjs/react-native-uiwjs-alipay
根据文档修改文件
ptug/react-native-alipay#1
复制功能
yarn add @react-native-community/clipboard
【Android】Reactnative Android键盘将底部导航栏顶起
解决方法:https://blog.csdn.net/Cui_xing_tian/article/details/90259792
Android】android studio 报错 Unknown host ‘jcenter.bintray.com’. You may need to adjust the proxy settings in Gradle.
解决方法:https://www.cnblogs.com/-mrl/p/11130684.html
【iOS/Android】接入高德地图
安装
npm i react-native-amap3d

# ios 项目需要更新 pods
cd ios
pod install
本项目从 v2.0.0 开始支持 RN 的 autolinking,不再需要手动配置。
获取高德 App Key
为了使用高德 SDK,你需要准备高德 App Key,获取方法参考高德地图 SDK 官方文档:
配置 Key
Android
android/app/src/main/AndroidManifest.xml
<application>
  <meta-data
    android:name="com.amap.api.v2.apikey"
    android:value="你的高德 Key" />
</application>
iOS
ios/UGoods/AppDelegate.m
- (BOOL)application:(UIApplication *)application didFinishLaunchingWithOptions:(NSDictionary *)launchOptions {

  // 高德地图
  [AMapServices sharedServices].apiKey = @"你的高德 Key";
}解决方案:https://blog.csdn.net/qq_25905161/article/details/81298254
打开网页:React Native - 网页组件(WebView)的使用详解
- 官方文档:
(https://reactnative.cn/docs/webview#startinloadingstate) - 参考文档:
(https://www.jianshu.com/p/d4fa88cc3b3d)
添加依赖包,使用命令
# 按文档上步骤发现需要安装依赖项: react-native-webview及react-native-get-random-values

yarn add react-native-webview
yarn add react-native-get-random-values
引用文件
import 'react-native-get-random-values';
import { WebView } from "react-native-webview"官方最新的使用文档:https://github.com/react-native-community/react-native-webview/blob/master/docs/Getting-Started.md
官方最新的 API 文档:https://github.com/react-native-community/react-native-webview/blob/master/docs/Reference.md
【Android/iOS】禁用横屏显示
android 参考:https://blog.csdn.net/weixin_42222874/article/details/84958146
添加在 AndroidManifest.xml文件:
android:screenOrientation="portrait" 修改 android/app/src/main/AndroidManifest.xml
iOS参考:
修改:ios/UGoods/Info.plist
<key>UISupportedInterfaceOrientations</key>
<array>
  <string>UIInterfaceOrientationPortrait</string>
+  <string>UIInterfaceOrientationLandscapeLeft</string>
+  <string>UIInterfaceOrientationLandscapeRight</string>
</array>
<key>UIViewControllerBasedStatusBarAppearance</key>
<false/>
消息 - 对接第三方 JPush
Android 配置
android/app/build.gradle
android {
      defaultConfig {
          applicationId "yourApplicationId"           // 在此替换你的应用包名
          ...
          manifestPlaceholders = [
                  JPUSH_APPKEY: "yourAppKey",         // 在此替换你的APPKey,平台获取 APPKey
                  JPUSH_CHANNEL: "yourChannel"        // 在此替换你的channel,默认 default 频道
          ]
      }
  }
dependencies {
      ...
      implementation project(':jpush-react-native')  // 添加 jpush 依赖
      implementation project(':jcore-react-native')  // 添加 jcore 依赖
  }
android/settings.gradle
include ':jpush-react-native'
project(':jpush-react-native').projectDir = new File(rootProject.projectDir, '../node_modules/jpush-react-native/android')
include ':jcore-react-native'
project(':jcore-react-native').projectDir = new File(rootProject.projectDir, '../node_modules/jcore-react-native/android')
android/app/src/main/AndroidManifest.xml
<meta-data
    android:name="JPUSH_CHANNEL"
    android:value="${JPUSH_CHANNEL}" />
<meta-data
    android:name="JPUSH_APPKEY"
    android:value="${JPUSH_APPKEY}" />
android/app/src/main/java/com/<项目名称>/MainApplication.java
注意事项:
- 更改符合规范的
applicationId - 引入 JPush 包
jcore-react-native和jpush-react-native,设置配置
- iOS SDK 集成指南
- iOS 证书设置指南
选择简便的 通过 APNs Auth Key 鉴权通过 .p12 证书鉴权- Android 配置 e31ffbad
- RN0.60以下需要打开,注意导包JPushPackage
⚠️ 下面 iOS 安装很重要,如果项目里使用pod安装过,请先执行命令 pod deintegrate
pod install
# ⚠️ 注意:如果项目里使用pod安装过,请先执行命令
pod deintegrate
⚠️ 调试选择 Debug 模式,在模拟器上测试。在 Release 的时候不能用模拟器,要用真机,或者可以直接 Archive
- 获取
RegistrationID调用 api 将RegistrationID告诉给后端
iOS@anneng/ane-configure#7 极光推送 JPUSH 不支持 i386 模拟器,使用 x86 模拟器或真机
- 从RN-JPush2.7.5开始,重新支持TypeScript
- 由于RN-JCore1.6.0存在编译问题,从RN-JCore1.7.0开始,还是需要在AndroidManifest.xml中添加配置代码,具体参考 配置-2.1 Android
推送消息
- 开发测试
JPUSH官网->添加消息推送->手机收到消息->存储消息model(持久化)->界面显示(获取model数据) - 测试环境:
将获取到的 JPUSH RegisterID 通过 API 告诉后端->后台Server推送消息->JPUSH Server 收到消息->添加消息推送->手机收到消息->存储消息model(持久化)->界面显示(获取model数据)


